Using Get Webhook For Rainbow Deployment
- Difficulty - intermediate
- Time To Complete - 20-30 minutes
- Free Tier Compatible - no
Resources
To complete this tutorial you'll need the following resources available at the time of getting started:
- Server
- Environment
- Hosted DNS Zone
- Image - included below
This repo was originally for the blog post on Github Actions, but will do perfectly for this tutorial.
You'll need to create an Image Source from either this repo using the Dockerfile image source type, or, create an image source of your own that you'd like to use to follow along with this tutorial.
If you're providing your own image source, please make sure the image is meant to be some type of publicly accessible service that serves on bind-all IPv6 and you know which port the server is bound to (internally).
Creating the Deployment
At this point you should have the following resources created:
- Server
- Environment
- DNS Zone (verified)
- Image Source
- And Image
The first thing to do is create a new deployment and then assign that deployment the appropriate tags so we can associate the tags to a linked record.
For this tutorial, we'll use the deploy container form to create our container and deployment in one step. Head the the environment you'd like to use (or new one you've created) and click the Deploy Container button to open the wizard.
After giving the container a name, you can leave everything else as the default settings until you get to Image. In the image section choose Recent Images and then your newly created image from the dropdown.
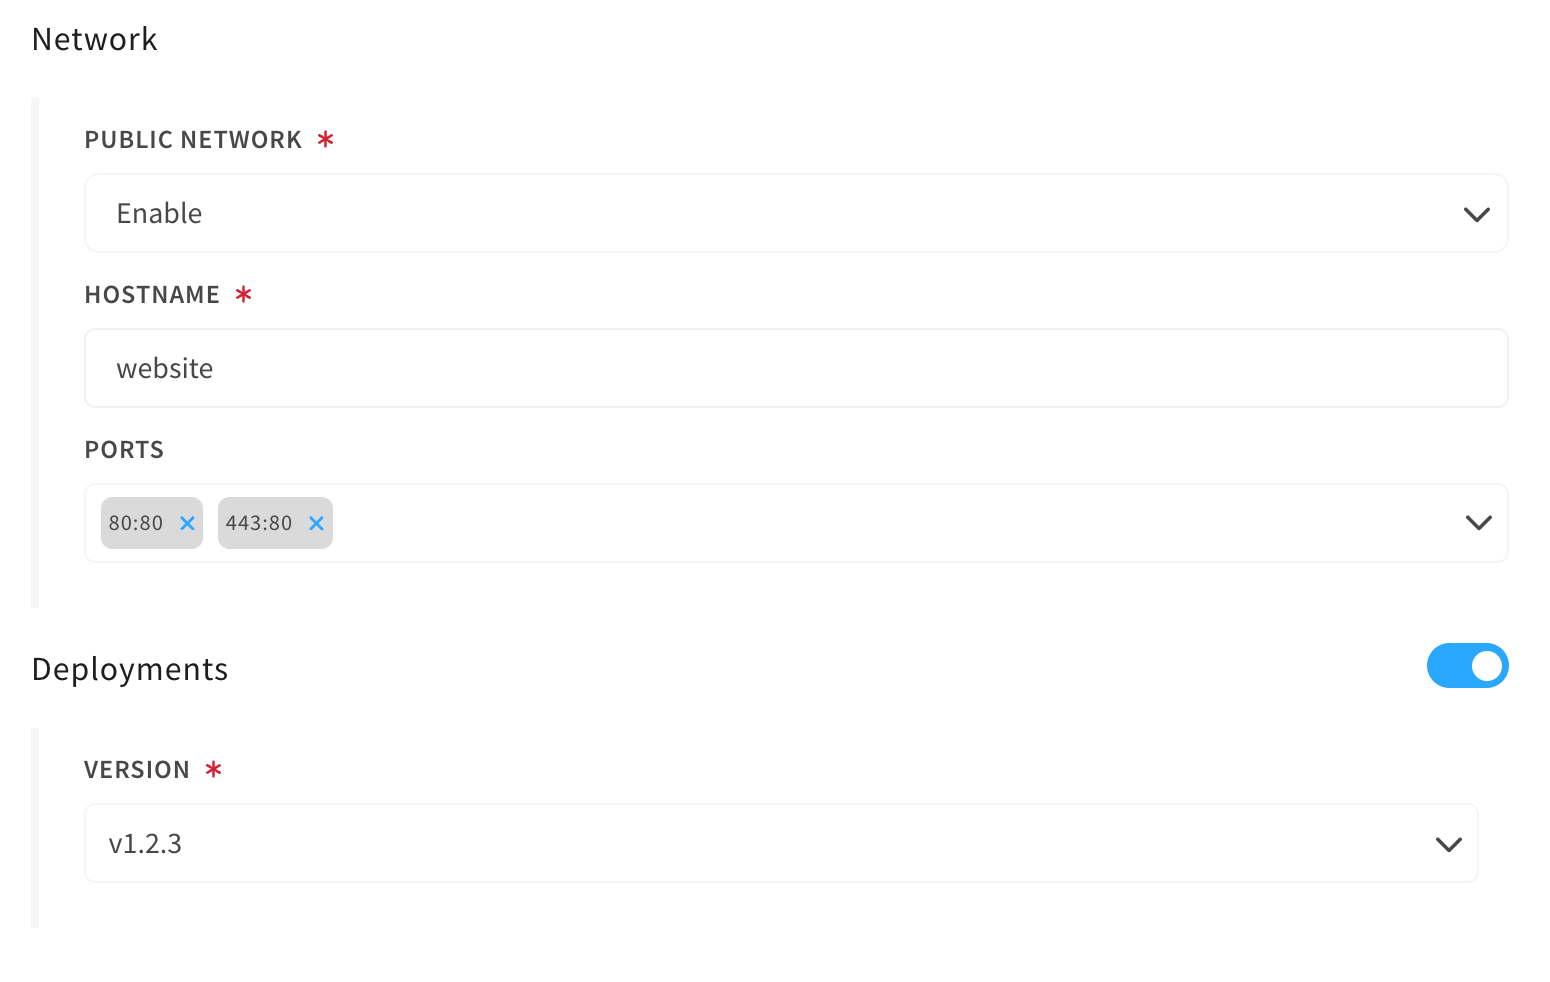
In the Network section change Public Network to enable and add the port mappings. We want to take advantage of TLS termination at the load balancer, so if your service listens on 80 you'd add the following port mappings 80:80 & 443:80.
At the bottom of the page, enable the deployment using the toggle and enter a version for this deployment.
Only versions starting with the character v will be held to semantic versioning standards.
Once you've filled out the form fields, click Deploy Container.
Tags & Linked Records
For this tutorial, we'll want to create at least 2 tags. I'll be creating a test tag and a current tag.
Adding a tag is simple, use the + button to open the form and then add the tag(s) you'd like to use. The image below shows the process of adding a tag called demotag.
| Create Tag | New Tag Showing on Dashboard |
|---|---|
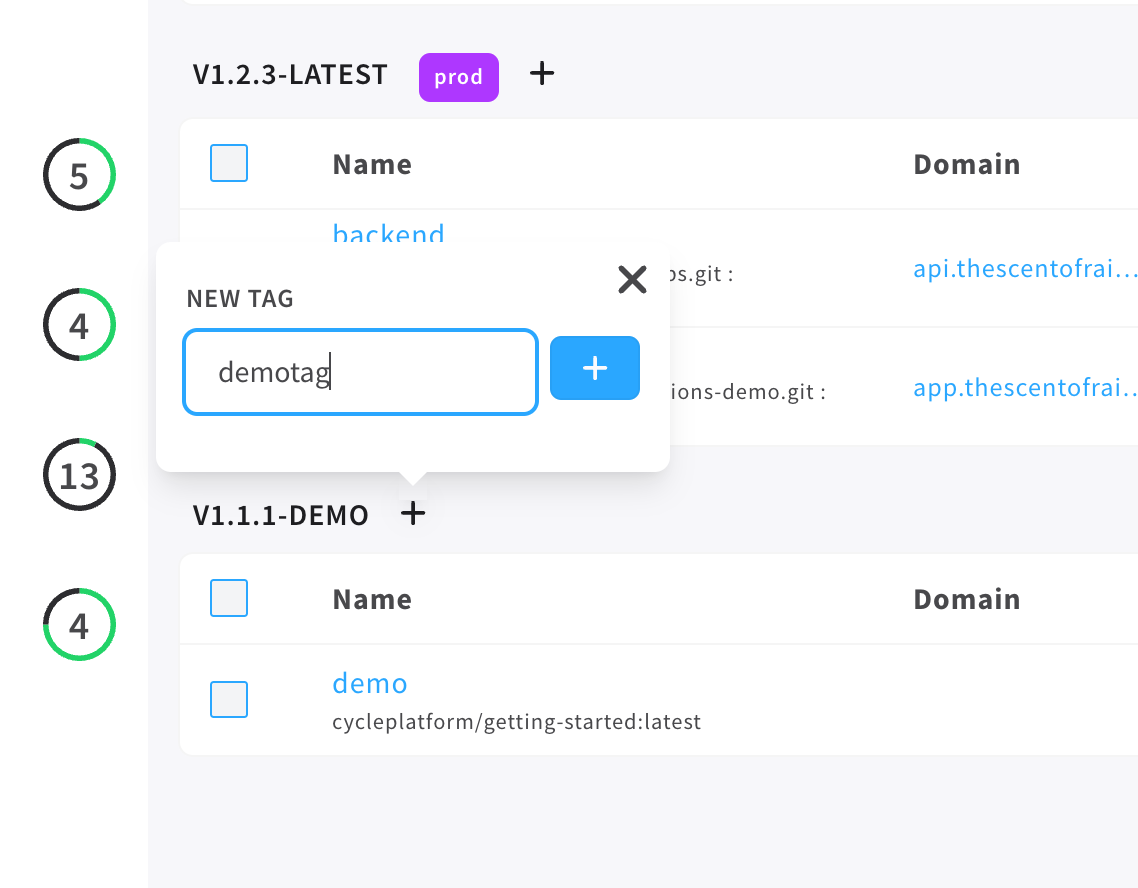 | 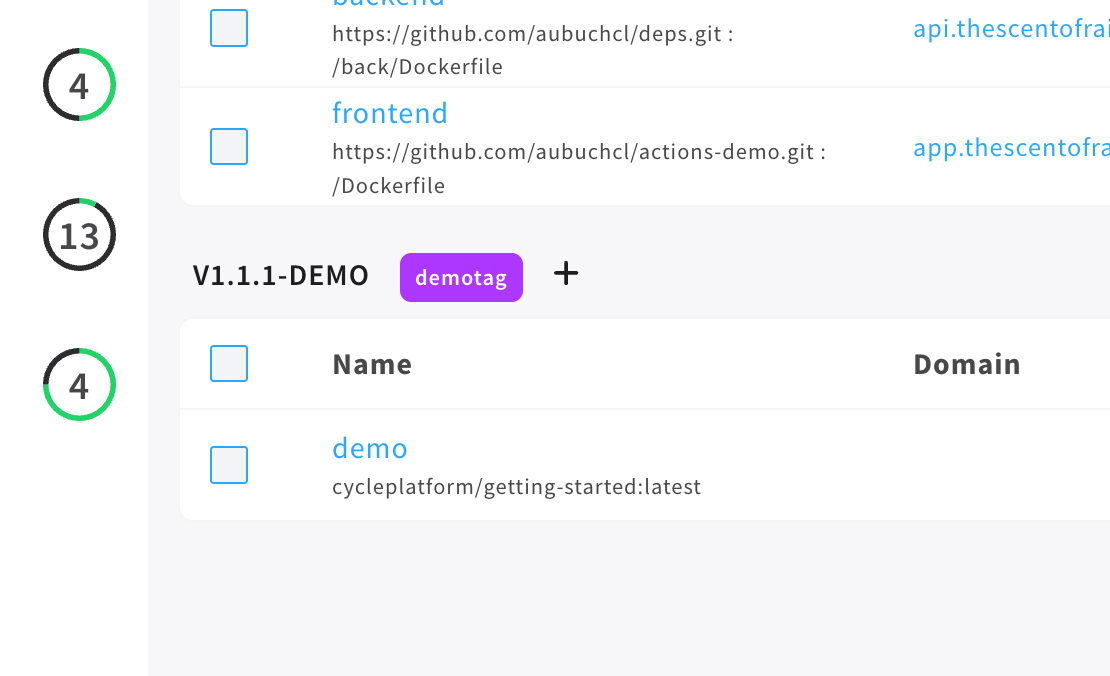 |
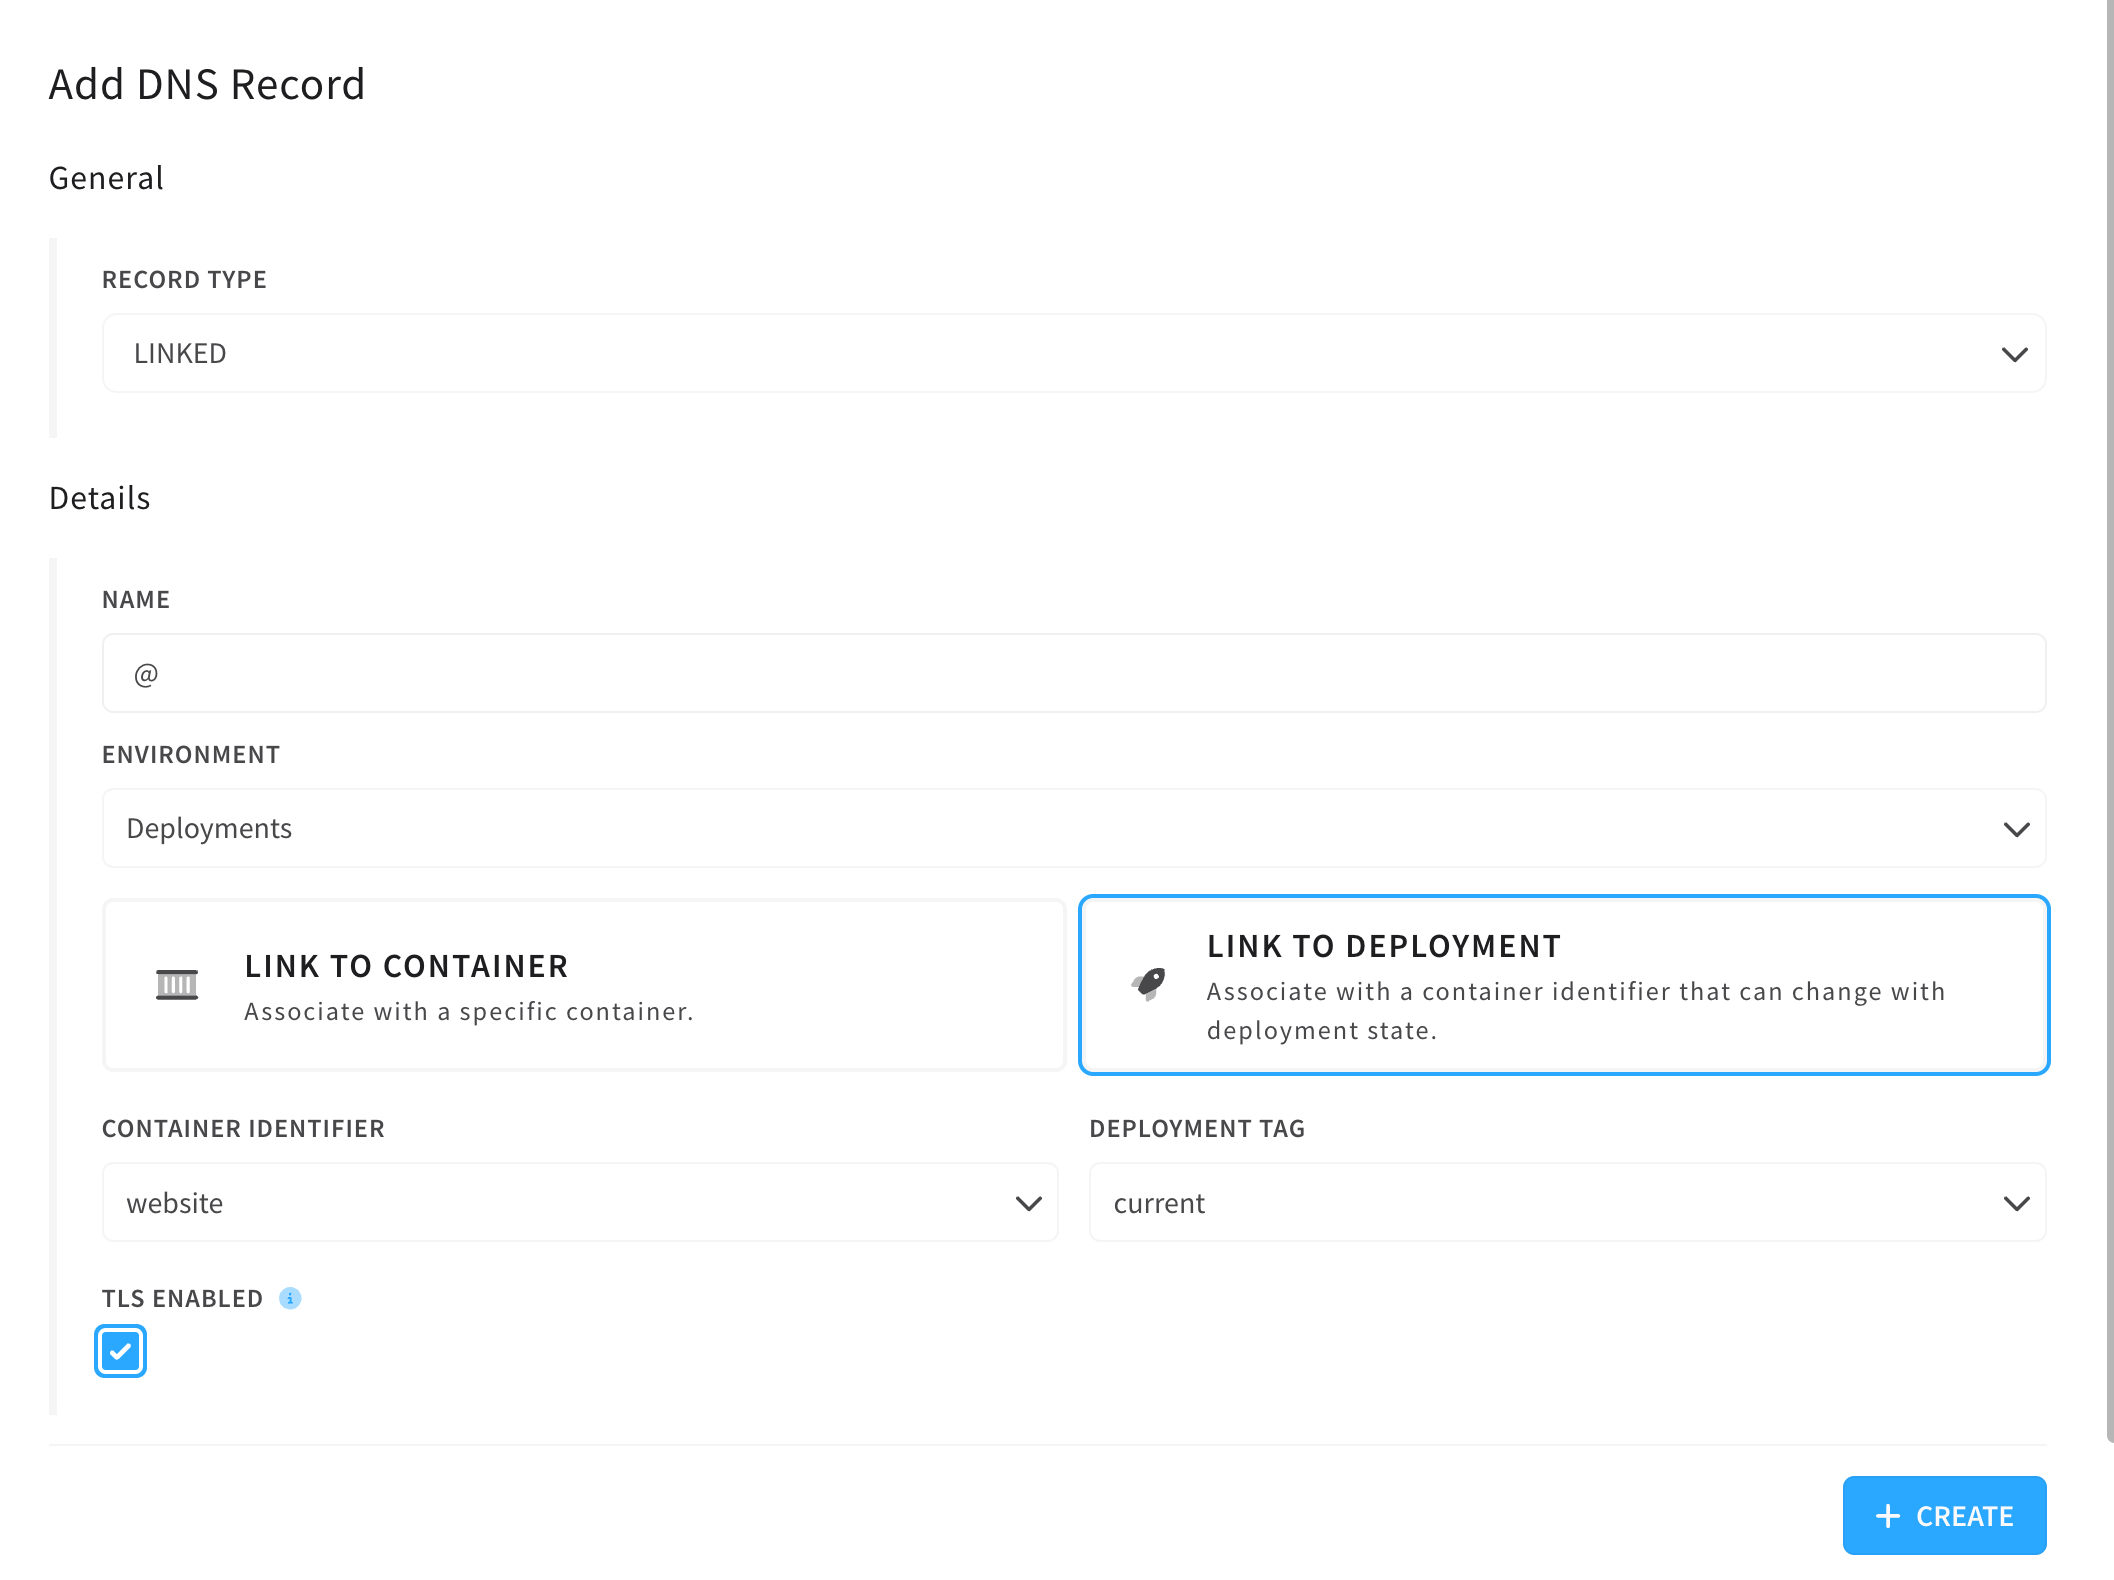
Once you have the tag's in place you can associate a linked record with the tag so that the linked record will always point to the container this tag is present on.
In the image below, I'm creating a record pointing to my website container that follows the tag current.
Before visiting the linked record URL's, start the environment using the Start All button.
Make sure you point another linked record to the secondary tag you've created as well. After thats all configured, visit the URL's to verify that they resolve and all is working as expected.
Adding the Pipeline
Head over to pipelines in the portal and click the Create button at the top of the page. Feel free to name the pipeline whatever you'd like. We'll use the Dynamic type, so that we can use variables.
We will create enough steps to accomplish our task of creating a new deployment and switching traffic to it. If you'd like to add additional steps you can but you'll want to add at least the steps defined in the tutorial.
Create Steps
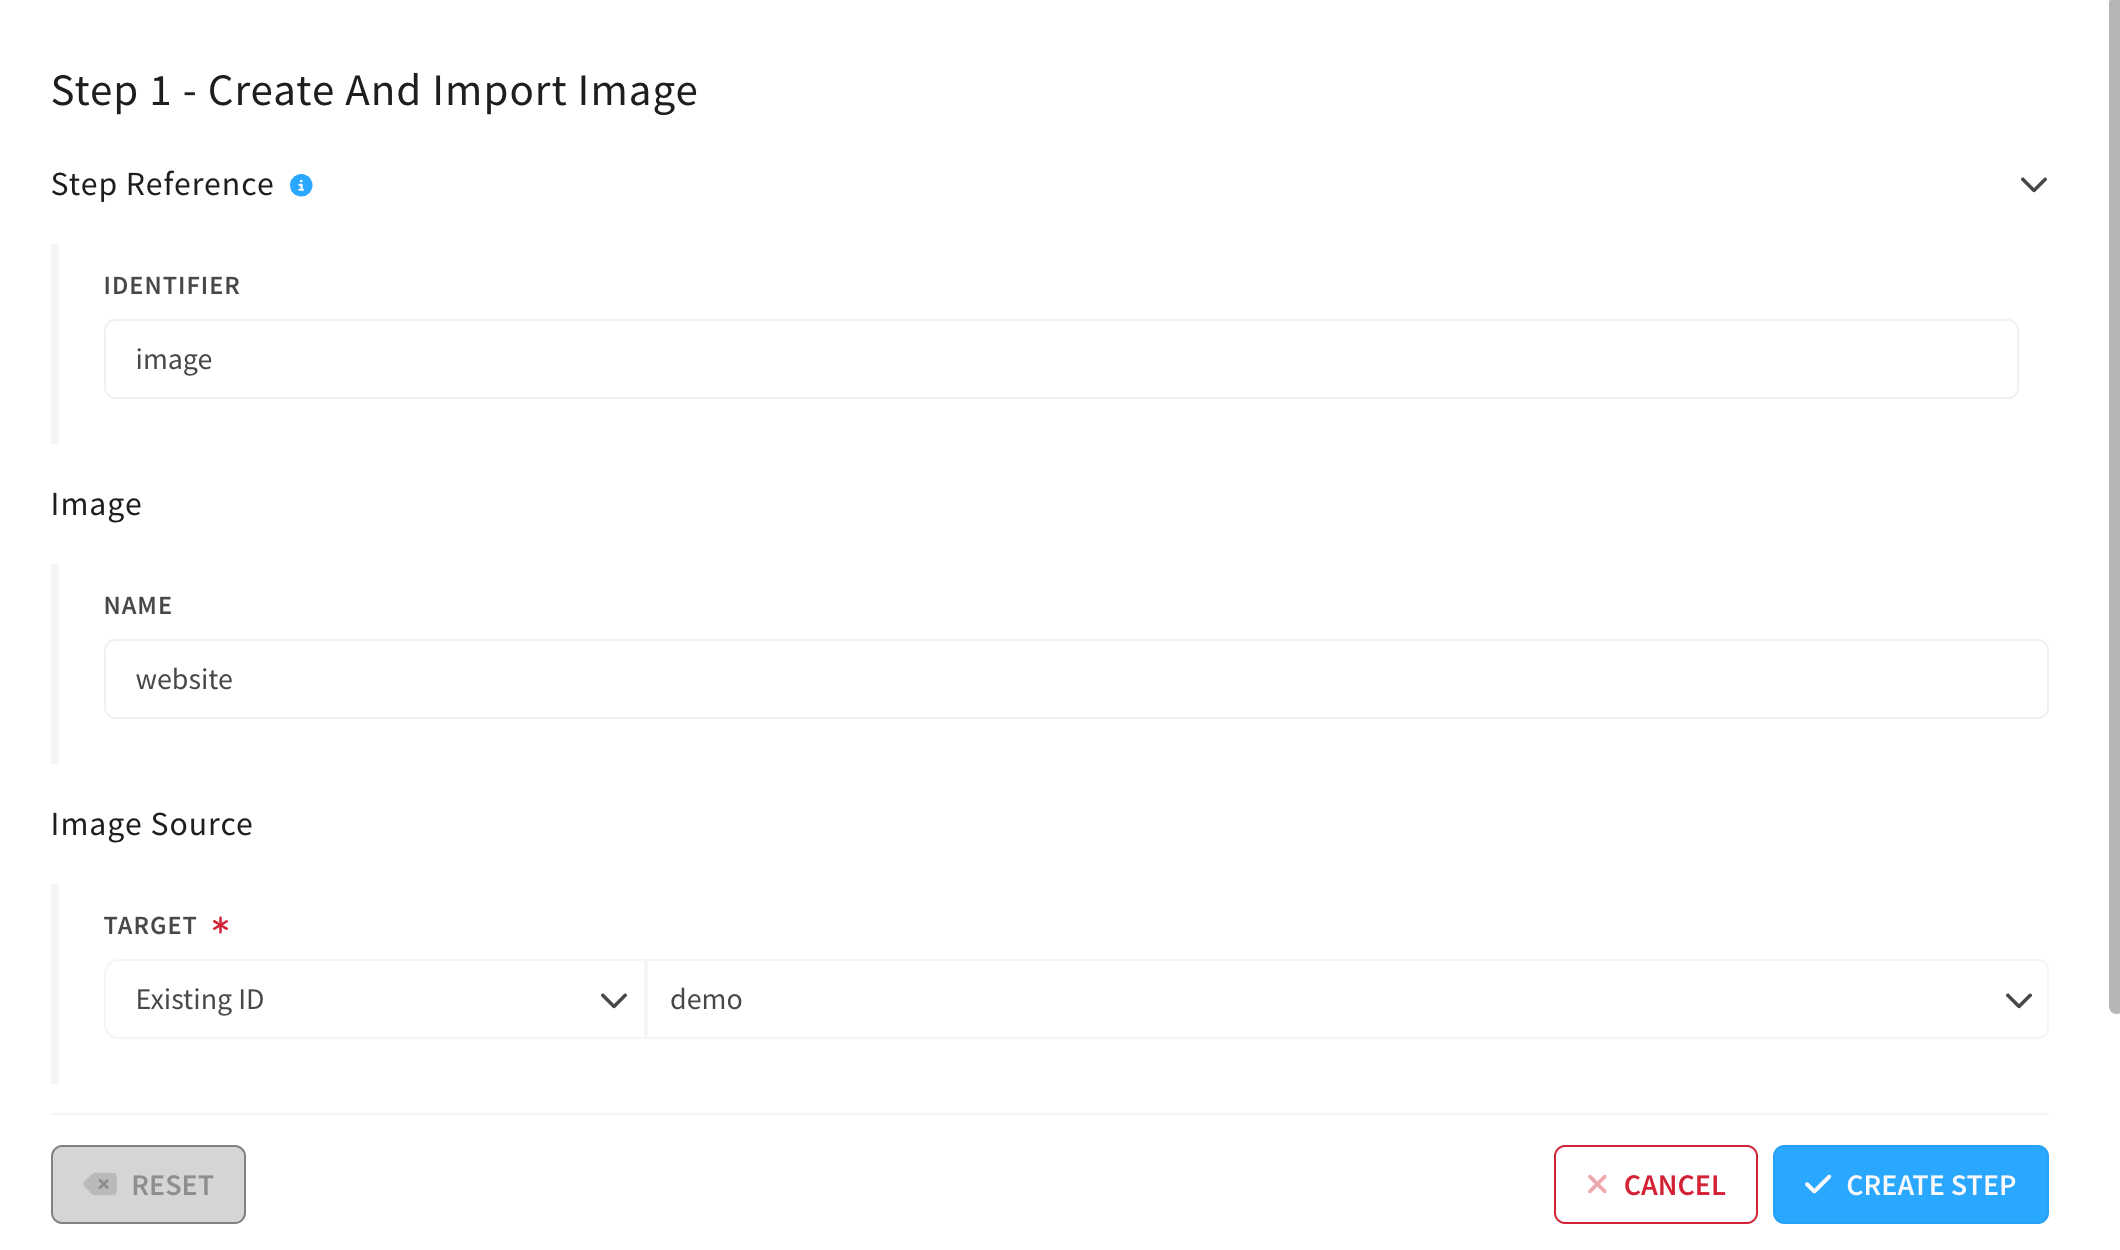
Click the Editor tab from the horizontal nav and add the stage. I'm calling mine deployment. After naming the stage, select the first step from the dropdown Create And Import Image.
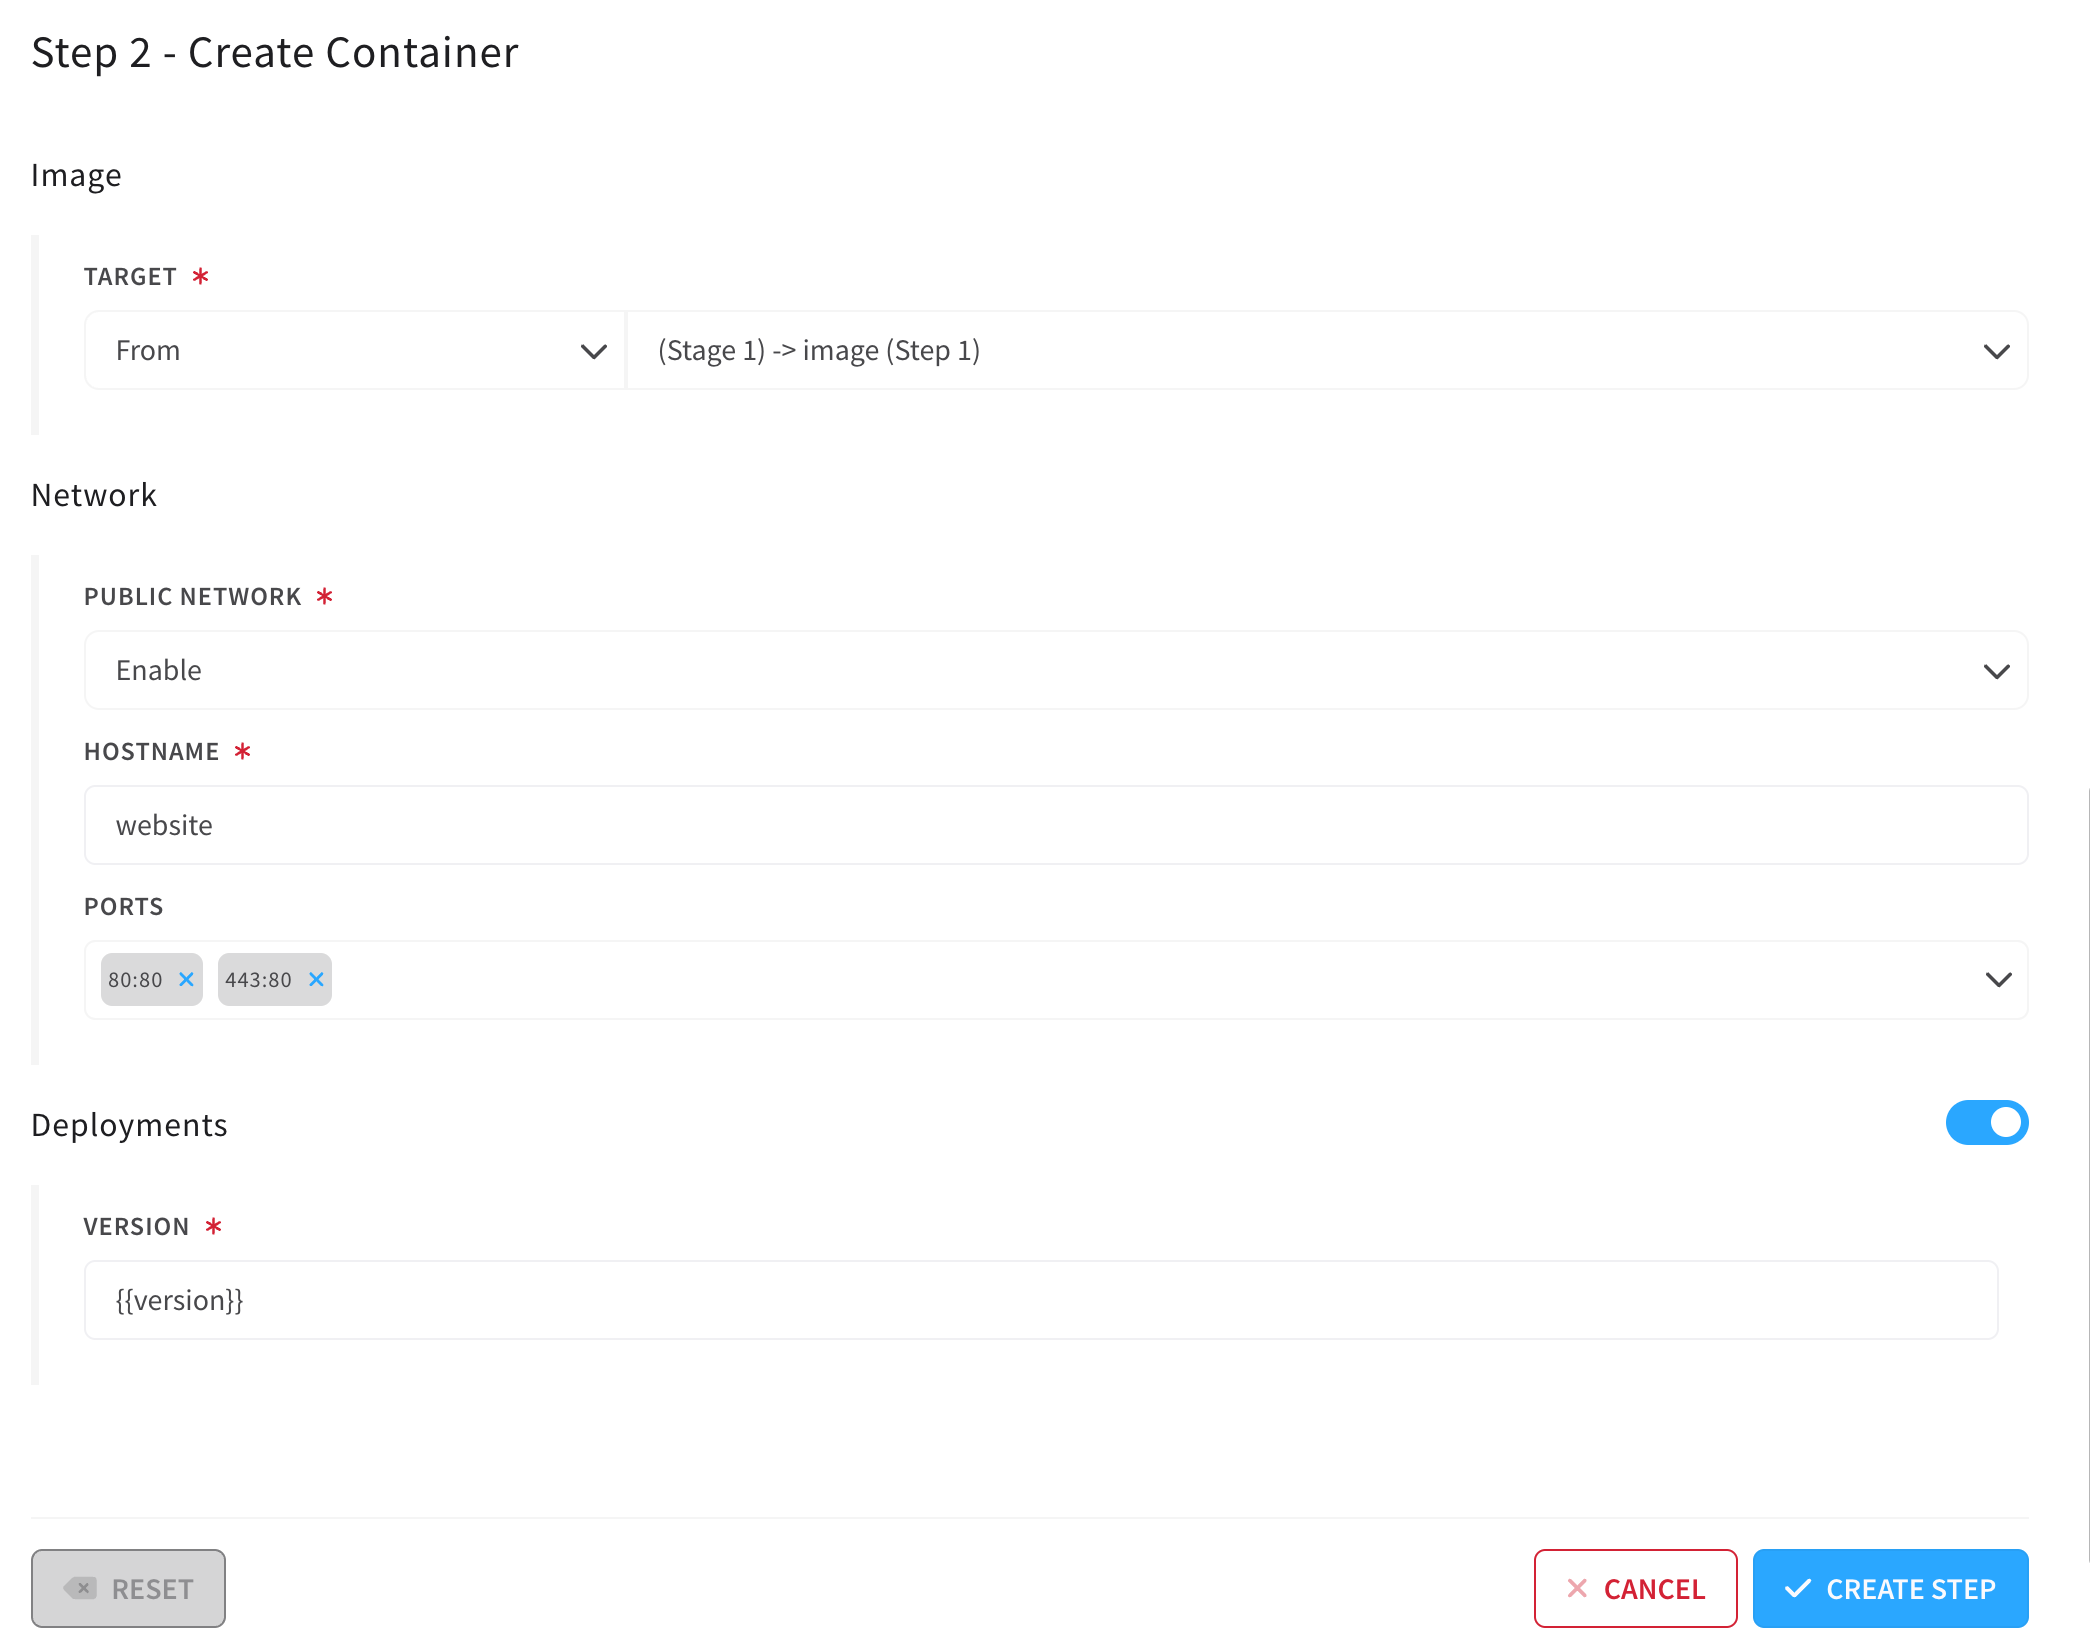
The second step to add in this stage is Create Container. Make sure when filling out the create container step you use the same container name that you did during your original container create. This name is used by the platform to create an identifier and the identifier is what's used by the linked record association. Also fill in the step identifier as we will use a reference to this container later in the pipeline.
For Environment use the Resource type and the variable {{environment}}.
For the Image use the From type to target the image we created and imported in the first step.
Fill in the bottom of the form the same as the first container we created EXCEPT for the deployment version which should use the {{version}} variable (it doesn't have to be named this but will be in the example below).
Deploy Steps
The next step in this pipeline is Start Environment Deployment. This step takes our {{environment}} variable and the {{version}}
The Start Environment Deployment step takes care of starting the deployment containers so we can now move on to updating the first deployment tag to point to the new deployment/container. To do this we'll add a Update Deployment Tag Version step.
There are only 3 fields in this step and we want to use variables for each one of them. For Environment use the Resource type with {{environment}}. Using the same variable here as before allows us to make sure that the same environment is used across all places this variable is set. The Tag field should be set to a variable, I used {{test-tag}} and the New Version field to {{version}} again aligning version around the variable {{version}}.
After the deployment tag version is updated, we'll add a Sleep step. This step will give the container a few moments to get up and running as well as eliminate the chance that the next step (Get Webhook) will hit the wrong resource. Set this step to 30s.
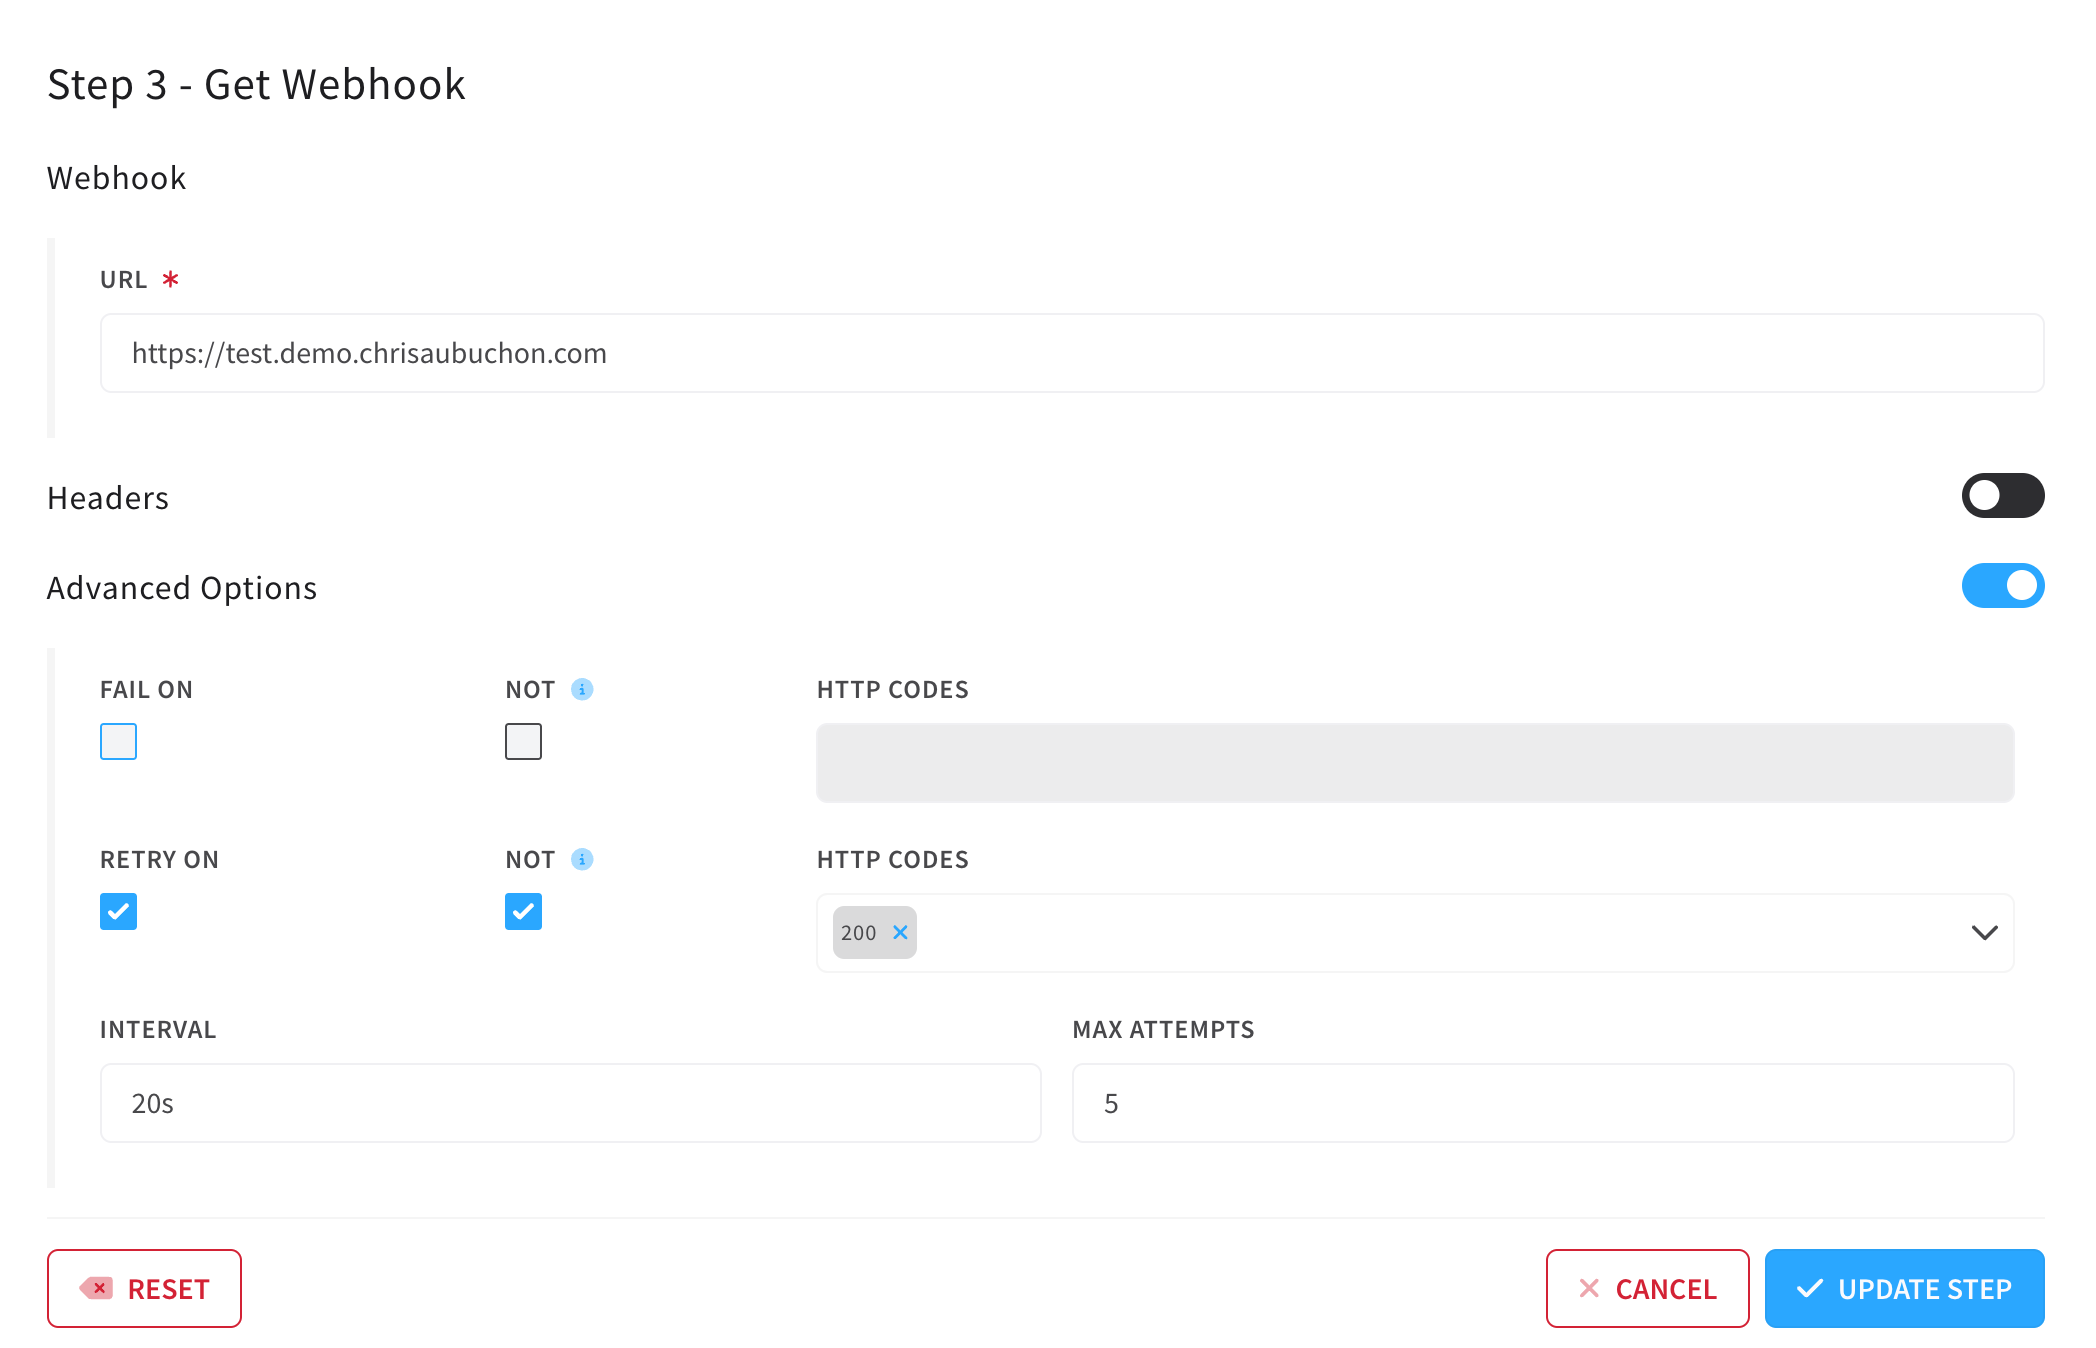
With the new deployment started and the first tag set to be moved, we want to be sure the container comes online and is able to respond to a request before moving our current tag to it. The next step we'll use will let us verify this. Create a Get Webhook step. For the URL field, set the URL to the URL of the linked record you associated with the test tag in the earlier step. Open the Advanced Options section and check the boxes next to Retry On and Not in the second row. Then enter the HTTP code 200 in the codes array.
This setting will tell Cycle, please retry this get webhook on any code that is not 200 from the URL.
Set the Interval to 20s (twenty seconds) and Max Attempts to 5. This will give Cycle additional parameters to use when retrying the call.
Updating The Final Tags
At this point we've verified that the new deployment is responding to the HTTP calls the way we expect and we're ready to move over the current tag. However, we also want to keep the previous deployment around in case we need to roll back. Let's take a look at how we can finish this up.
Add a new step Update Deployment Tag Version. Here the environment is the same one we've been using throughout this tutorial. In the deployment section we'll set up two tags, the Existing Tag and the New Tag. We know from earlier in the guide that there is one existing tag named current. We can use this existing tag to target the deployment that already exists. Enter the value current in the Existing Tag field. For the New Tag field enter the tag previous. What we're able to accomplish here is tagging the existing deployment so that we always have the previous deployment around in case we need to role back. This will also allow us to later use the prune functionality on this environment cleaning up any untagged deployments.
Next we'll add another Update Deployment Tag Version step. The environment here is again the same. The Deployment Type needs to be set to Version which will change the field next to it to Existing Version. Because we've already deployed the new version we can target the {{version}} pipeline variable here. The next field New Tag will be current.
Now we have 2 existing deployments, one deployment marked previous which represents the previously deployed code and one deployment marked current which represents the newest code. This is a great pattern because its now possible to roll back to the previous deployment by simply updating the tag.
Cleanup Steps
Cleanup is just one step Prune Environment Deployments. This step will prune all deployments (and their containers) for any deployment that does not have any tag assigned to it.
For the single field on this form use the Resource type and again use the {{environment}} variable.
Remember to use the Save Pipeline button at the bottom of the screen to save all your step and stage changes.
Changing the Website
Before we fire off this pipeline we want to make a change to the website itself. If you're using the resource provided by this tutorial, all you'll need to do is change one of the text lines in the /src/App.js file to something else and commit that change.
Triggering the Pipeline
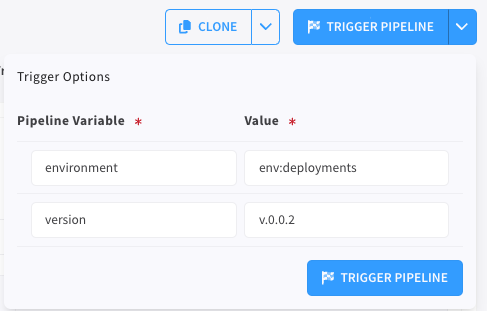
Head back to the pipeline you just created. In the top right corner of the screen there is a button Trigger Pipeline, next to the button is a V, click there and fill in the variables with the correct values.
If you've never used the resource identifiers before, the {{environment}} variable needs the format env:identifier or environment:identifier. If you don't have the environment identifier, just go to the environment's settings page and copy it.
Example Values:
Deployment Complete
After firing the pipeline, your changes will be live within the next few minutes.
If you want to see some of the jobs in action, head over to the environment > deployments page and you'll see the container being created, as well as the first and second tag updating. As soon as that second tag is updated your site will be rendering the new changes you've made.